-
Notifications
You must be signed in to change notification settings - Fork 3.4k
Adding serverless blog example #1457
New issue
Have a question about this project? Sign up for a free GitHub account to open an issue and contact its maintainers and the community.
By clicking “Sign up for GitHub”, you agree to our terms of service and privacy statement. We’ll occasionally send you account related emails.
Already on GitHub? Sign in to your account
Merged
Merged
Changes from all commits
Commits
Show all changes
4 commits
Select commit
Hold shift + click to select a range
File filter
Filter by extension
Conversations
Failed to load comments.
Loading
Jump to
Jump to file
Failed to load files.
Loading
Diff view
Diff view
There are no files selected for viewing
This file contains hidden or bidirectional Unicode text that may be interpreted or compiled differently than what appears below. To review, open the file in an editor that reveals hidden Unicode characters.
Learn more about bidirectional Unicode characters
| Original file line number | Diff line number | Diff line change |
|---|---|---|
| @@ -0,0 +1,289 @@ | ||
| --- | ||
| title: Create a CMS-Powered Blog | ||
| type: cookbook | ||
| order: 5 | ||
| --- | ||
|
|
||
| # Create a CMS-Powered Blog Using Vue.js | ||
|
|
||
| So you've just launched your Vue.js website, congrats! Now you want to add a blog that quickly plugs into your website and you don't want to have to spin up a whole server just to host a Wordpress instance (or any DB-powered CMS for that matter). You want to just be able to add a few Vue.js blog components and some routes and have it all just work, right? What you're looking for a blog that's powered entirely by API's you can consume directly from your Vue.js application. This tutorial will teach you how to do just that, let's dive in! | ||
|
|
||
| We're going to quickly build a CMS-powered blog with Vue.js. It uses [ButterCMS](https://buttercms.com/), an API-first CMS that lets you manage content using the ButterCMS dashboard and integrate our content API into your Vue.js app. You can use ButterCMS for new or existing Vue.js projects. | ||
|
|
||
|  | ||
|
|
||
| ## Install | ||
|
|
||
| Run this in your commandline: | ||
|
|
||
| `npm install buttercms --save` | ||
|
|
||
| Butter can also be loaded using a CDN: | ||
|
|
||
| `<script src="https://cdnjs.buttercms.com/buttercms-1.1.0.min.js"></script>` | ||
|
|
||
| ## Quickstart | ||
|
|
||
| Set your API token: | ||
|
|
||
| `var butter = require('buttercms')('your_api_token');` | ||
|
|
||
| Using ES6: | ||
|
|
||
| ```javascript | ||
| import Butter from 'buttercms'; | ||
| const butter = Butter('your_api_token'); | ||
| ``` | ||
|
|
||
| Using CDN: | ||
|
|
||
| ```javascript | ||
| <script src="https://cdnjs.buttercms.com/buttercms-1.1.0.min.js"></script> | ||
| <script> | ||
| var butter = Butter('your_api_token'); | ||
| </script> | ||
| ``` | ||
|
|
||
| Import this file into any component you want to use ButterCMS. Then from the console run: | ||
|
|
||
| ```javascript | ||
| butter.post.list({page: 1, page_size: 10}).then(function(response) { | ||
| console.log(response) | ||
| }) | ||
| ``` | ||
|
|
||
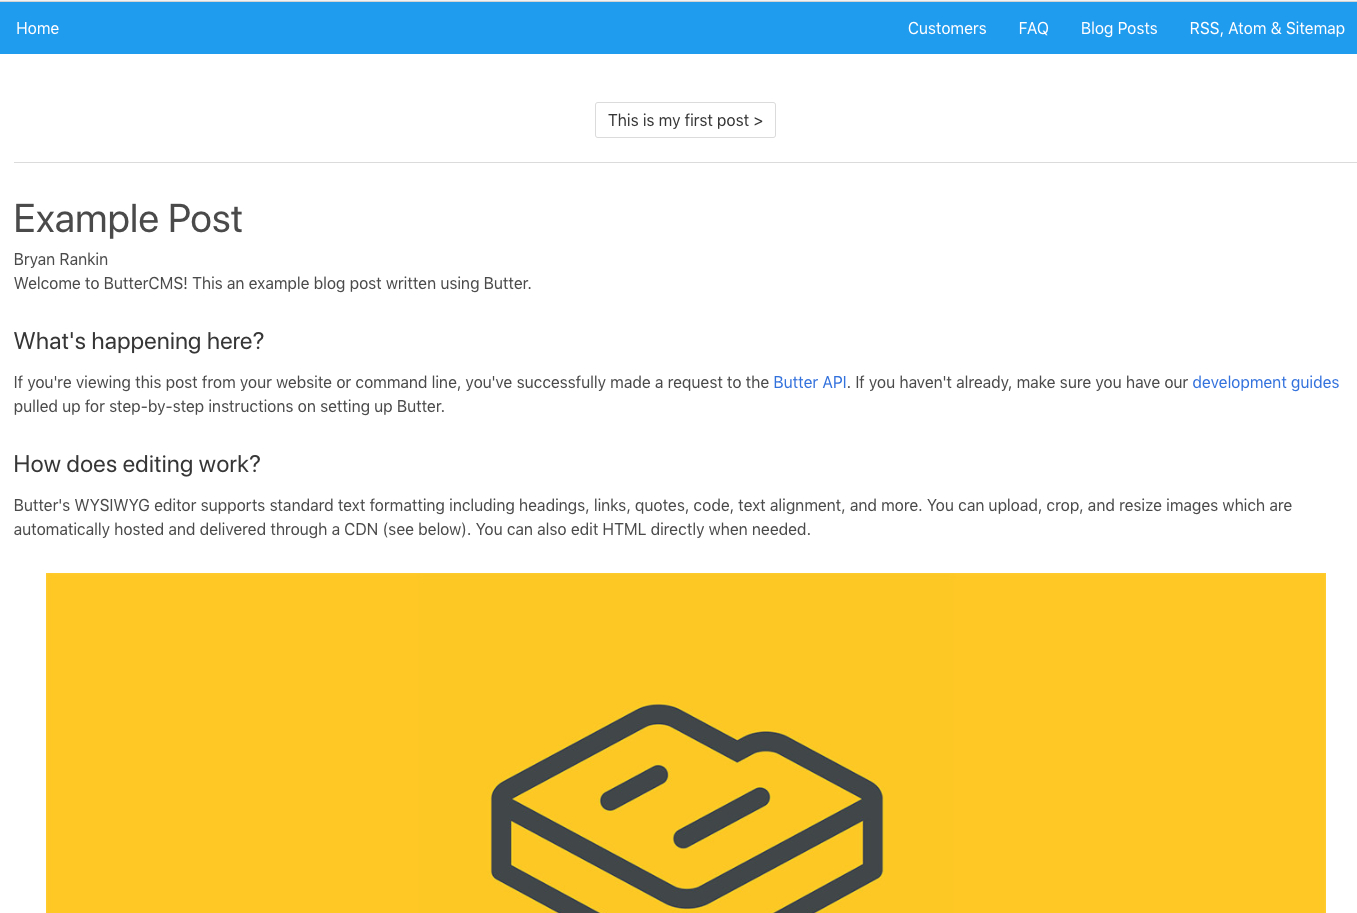
| This API request fetches your blog posts. Your account comes with one example post which you'll see in the response. | ||
|
|
||
| ## Display posts | ||
| To display posts we create a `/blog` route (using vue-router) in our app and fetch blog posts from the Butter API, as well as a `/blog/:slug` route to handle individual posts. | ||
|
|
||
| See the ButterCMS [API reference](https://buttercms.com/docs/api/?javascript#blog-posts) for additional options such as filtering by category or author. The response also includes some metadata we'll use for pagination. | ||
|
|
||
| `router/index.js:` | ||
|
|
||
| ```javascript | ||
| import Vue from 'vue' | ||
| import Router from 'vue-router' | ||
| import BlogHome from '@/components/BlogHome' | ||
| import BlogPost from '@/components/BlogPost' | ||
|
|
||
| Vue.use(Router) | ||
|
|
||
| export default new Router({ | ||
| mode: 'history', | ||
| routes: [ | ||
| { | ||
| path: '/blog/', | ||
| name: 'blog-home', | ||
| component: BlogHome | ||
| }, | ||
| { | ||
| path: '/blog/:slug', | ||
| name: 'blog-post', | ||
| component: BlogPost | ||
| } | ||
| ] | ||
| }) | ||
| ``` | ||
|
|
||
| Then create `components/BlogHome.vue` which will be your blog homepage that lists your most recent posts. | ||
|
|
||
| ```javascript | ||
| <script> | ||
| import { butter } from '@/buttercms' | ||
| export default { | ||
| name: 'blog-home', | ||
| data() { | ||
| return { | ||
| page_title: 'Blog', | ||
| posts: [] | ||
| } | ||
| }, | ||
| methods: { | ||
| getPosts() { | ||
| butter.post.list({ | ||
| page: 1, | ||
| page_size: 10 | ||
| }).then((res) => { | ||
| // console.log(res.data) | ||
| this.posts = res.data.data | ||
| }) | ||
| } | ||
| }, | ||
| created() { | ||
| this.getPosts() | ||
| } | ||
| } | ||
| </script> | ||
| Display the result | ||
|
|
||
| <template> | ||
| <div id="blog-home"> | ||
| <h1>{{ page_title }}</h1> | ||
| <!-- Create v-for and apply a key for Vue. Example is using a combination of the slug and index --> | ||
| <div v-for="(post,index) in posts" :key="post.slug + '_' + index"> | ||
| <router-link :to="'/blog/' + post.slug"> | ||
| <article class="media"> | ||
| <figure> | ||
| <!-- Bind results using a ':' --> | ||
| <!-- Use a v-if/else if their is a featured_image --> | ||
| <img v-if="post.featured_image" :src="post.featured_image" alt=""> | ||
| <img v-else src="http://via.placeholder.com/250x250" alt=""> | ||
| </figure> | ||
| <h2>{{ post.title }}</h2> | ||
| <p>{{ post.summary }}</p> | ||
| </article> | ||
| </router-link> | ||
| </div> | ||
| </div> | ||
| </template> | ||
| ``` | ||
|
|
||
| Here's what it looks like (note we added CSS from https://bulma.io/ for quick styling): | ||
|
|
||
|  | ||
|
|
||
|
|
||
| Now create `components/BlogPost.vue` which will be your Blog Post page to list a single post. | ||
|
|
||
| ```javascript | ||
| <script> | ||
| import { butter } from '@/buttercms' | ||
| export default { | ||
| name: 'blog-post', | ||
| data() { | ||
| return { | ||
| post: {} | ||
| } | ||
| }, | ||
| methods: { | ||
| getPost() { | ||
| butter.post.retrieve(this.$route.params.slug) | ||
| .then((res) => { | ||
| // console.log(res.data) | ||
| this.post = res.data | ||
| }).catch((res) => { | ||
| console.log(res) | ||
| }) | ||
| } | ||
| }, | ||
| created() { | ||
| this.getPost() | ||
| } | ||
| } | ||
| </script> | ||
| Display the results | ||
| <template> | ||
| <div id="blog-post"> | ||
| <h1>{{ post.data.title }}</h1> | ||
| <h4>{{ post.data.author.first_name }} {{ post.data.author.last_name }}</h4> | ||
| <div v-html="post.data.body"></div> | ||
|
|
||
| <router-link v-if="post.meta.previous_post" :to="/blog/ + post.meta.previous_post.slug" class="button"> | ||
| {{ post.meta.previous_post.title }} | ||
| </router-link> | ||
| <router-link v-if="post.meta.next_post" :to="/blog/ + post.meta.next_post.slug" class="button"> | ||
| {{ post.meta.next_post.title }} | ||
| </router-link> | ||
| </div> | ||
| </template> | ||
| ``` | ||
|
|
||
| Here's a preview: | ||
|
|
||
|  | ||
|
|
||
|
|
||
| Now our app is pulling all blog posts and we can navigate to individual posts. However, our next/previous post buttons are not working. | ||
|
|
||
| One thing to note when using routes with params is that when the user navigates from /blog/foo to /blog/bar, the same component instance will be reused. Since both routes render the same component, this is more efficient than destroying the old instance and then creating a new one. | ||
|
|
||
| <p class="tip">Be aware, that using the component this way will mean that the lifecycle hooks of the component will not be called. Visit the Vue.js docs to learn more about [Dynamic Route Matching](https://router.vuejs.org/en/essentials/dynamic-matching.html)</p> | ||
|
|
||
| To fix this we need to watch the `$route` object and call `getPost()` when the route changes. | ||
|
|
||
| Updated `script` section in `components/BlogPost.vue`: | ||
|
|
||
| ```javascript | ||
| <script> | ||
| import { butter } from '@/buttercms' | ||
| export default { | ||
| name: 'blog-post', | ||
| data() { | ||
| return { | ||
| post: {} | ||
| } | ||
| }, | ||
| methods: { | ||
| getPost() { | ||
| butter.post.retrieve(this.$route.params.slug) | ||
| .then((res) => { | ||
| // console.log(res.data) | ||
| this.post = res.data | ||
| }).catch((res) => { | ||
| console.log(res) | ||
| }) | ||
| } | ||
| }, | ||
| watch: { | ||
| $route(to, from) { | ||
| this.getPost() | ||
| } | ||
| }, | ||
| created() { | ||
| this.getPost() | ||
| } | ||
| } | ||
| </script> | ||
| ``` | ||
|
|
||
| Now your app has a working blog that can be updated easily in the ButterCMS dashboard. | ||
|
|
||
| ## Categories, Tags, and Authors | ||
|
|
||
| Use Butter's APIs for categories, tags, and authors to feature and filter content on your blog. | ||
|
|
||
| See the ButterCMS API reference for more information about these objects: | ||
|
|
||
| * [Categories](https://buttercms.com/docs/api/?ruby#categories) | ||
| * [Tags](https://buttercms.com/docs/api/?ruby#tags) | ||
| * [Authors](https://buttercms.com/docs/api/?ruby#authors) | ||
|
|
||
| Here's an example of listing all categories and getting posts by category. Call these methods on the `created()` lifecycle hook: | ||
|
|
||
| ``` | ||
| methods: { | ||
| ... | ||
| getCategories() { | ||
| butter.category.list() | ||
| .then((res) => { | ||
| console.log('List of Categories:') | ||
| console.log(res.data.data) | ||
| }) | ||
| }, | ||
| getPostsByCategory() { | ||
| butter.category.retrieve('example-category', { | ||
| include: 'recent_posts' | ||
| }) | ||
| .then((res) => { | ||
| console.log('Posts with specific category:') | ||
| console.log(res) | ||
| }) | ||
| } | ||
| }, | ||
| created() { | ||
| ... | ||
| this.getCategories() | ||
| this.getPostsByCategory() | ||
| } | ||
| ``` | ||
|
|
||
| ## Alternative Patterns | ||
|
|
||
| An alternative pattern to consider, especially if you prefer writing only in Markdown, is using something like [Nuxtent](https://nuxtent.now.sh/guide/writing#async-components). Nuxtent allows you to use `Vue Component` inside of Markdown files. This approach would be akin to a static site approach (i.e. Jekyll) where you compose your blog posts in Markdown files. Nuxtent adds a nice integration between Vue.js and Markdown allowing you to live in a 100% Vue.js world. | ||
|
|
||
|
|
||
| ## Wrap up | ||
|
|
||
| That's it! You now have a fully functional CMS-powered blog running in your app. We hope this tutorial was helpful and made your development experience with Vue.js even more enjoyable :) | ||
|
|
||
Add this suggestion to a batch that can be applied as a single commit.
This suggestion is invalid because no changes were made to the code.
Suggestions cannot be applied while the pull request is closed.
Suggestions cannot be applied while viewing a subset of changes.
Only one suggestion per line can be applied in a batch.
Add this suggestion to a batch that can be applied as a single commit.
Applying suggestions on deleted lines is not supported.
You must change the existing code in this line in order to create a valid suggestion.
Outdated suggestions cannot be applied.
This suggestion has been applied or marked resolved.
Suggestions cannot be applied from pending reviews.
Suggestions cannot be applied on multi-line comments.
Suggestions cannot be applied while the pull request is queued to merge.
Suggestion cannot be applied right now. Please check back later.
There was a problem hiding this comment.
Choose a reason for hiding this comment
The reason will be displayed to describe this comment to others. Learn more.
This is a good tip to include, thanks for pointing this out to people